

How to install FTTA patch cords in a ceiling?
Jun 02, 2026
Leave a message
Installing FTTA (Fiber to the Antenna) patch cords in a ceiling can be a challenging yet rewarding task. As a supplier of high - quality FTTA patch cords, I've seen firsthand the importance of a proper installation process. In this blog, I'll guide you through the steps of installing FTTA patch cords in a ceiling, ensuring a reliable and efficient setup.
Pre - installation Preparation
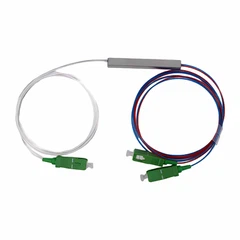
Before you start the installation, it's crucial to gather all the necessary tools and materials. You'll need a ladder, cable cutters, cable ties, a drill, and of course, the FTTA patch cords. Make sure to choose the right type of patch cords for your specific needs. We offer a variety of options, such as the HYBRID FIBER CABLE, which combines different types of fibers in one cable, providing flexibility and high - performance.
It's also important to plan the route of the patch cords. Determine the starting point (usually the base station equipment) and the end point (the antenna). Measure the distance and mark the path on the ceiling. Consider any obstacles such as ventilation ducts, electrical wires, or structural beams that might affect the installation.
Safety First
Safety should always be your top priority when working in a ceiling. Wear appropriate safety gear, including a hard hat, safety glasses, and non - slip shoes. Make sure the ladder is stable and properly positioned. If the ceiling is higher than 6 feet, it's recommended to use a fall protection system.
Ceiling Access
If the ceiling is a drop - ceiling, you can easily remove the ceiling tiles to access the space above. For a solid ceiling, you may need to drill holes to run the patch cords. Use a drill with the appropriate bit size and be careful not to damage any existing wiring or pipes.
Running the Patch Cords
Once you have access to the ceiling space, start running the patch cords along the pre - marked route. Use cable ties to secure the cords at regular intervals to prevent them from sagging or getting tangled. Make sure to leave some slack in the cords to allow for future adjustments.
When running the cords, be careful not to bend them too sharply. Fiber optic cables are sensitive to bending, and excessive bending can cause signal loss. The minimum bend radius for most fiber optic cables is typically around 10 - 20 times the cable diameter.
Connecting the Patch Cords
After running the patch cords to the antenna and the base station equipment, it's time to connect them. First, clean the connectors using a lint - free cloth and a fiber optic cleaning solution. This will ensure a good connection and minimize signal loss.
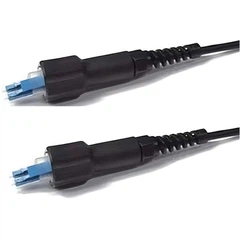
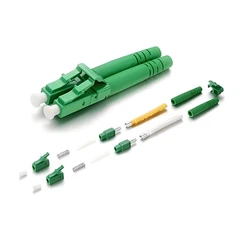
There are different types of connectors available, such as LC, SC, and MPO. Make sure to use the correct type of connector for your equipment. For example, our IPFX LC SC MPO CPRI Optic Patch Cord offers a variety of connector options to meet different requirements.
Insert the connectors into the corresponding ports on the antenna and the base station equipment. Make sure the connectors are properly seated and locked in place. You can use a fiber optic tester to check the signal strength and ensure a proper connection.
Testing and Troubleshooting
Once the patch cords are connected, it's important to test the system. Use a fiber optic tester to measure the optical loss and check for any signal degradation. If the test results are not satisfactory, you may need to troubleshoot the system.
Common issues include loose connectors, damaged cables, or improper termination. Check all the connections and make sure they are tight. Inspect the cables for any visible damage, such as cuts or kinks. If necessary, replace the damaged cables or connectors.
Securing the Cords
After testing and troubleshooting, secure the patch cords to prevent them from moving or being damaged. Use additional cable ties or cable management systems to keep the cords organized and in place. You can also use cable trays or raceways to protect the cords from physical damage.


Considerations for Different Ceiling Types
- Drop - Ceiling: As mentioned earlier, drop - ceilings are relatively easy to access. However, make sure to replace the ceiling tiles carefully to avoid damaging the cords. You can use cable clips to hold the cords in place between the tiles.
- Solid Ceiling: For solid ceilings, it's important to seal the holes after running the cords to prevent dust and pests from entering. You can use caulk or a fire - rated sealant to seal the holes.
Using the Right Patch Cords
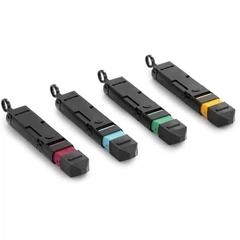
We also offer the FULLAXS MINI CABLE ASSEMBLY, which is a compact and lightweight option suitable for tight spaces. When choosing the patch cords, consider factors such as the length, the number of fibers, and the type of connectors.
Conclusion
Installing FTTA patch cords in a ceiling requires careful planning, proper tools, and attention to detail. By following the steps outlined in this blog, you can ensure a successful installation. As a leading supplier of FTTA patch cords, we are committed to providing high - quality products and excellent customer service.
If you're interested in purchasing FTTA patch cords or have any questions about the installation process, please feel free to contact us. We'll be happy to assist you with your procurement needs and provide you with the best solutions for your projects.
References
- Fiber Optic Installation Handbook
- Telecommunications Cabling Standards
Send Inquiry